
Version 5 is available via the Downloads section of our website here.
Probate Plus can operate as a stand-alone installation, or can be networked with your colleagues to share your caseload. It provides a way to centralise and standardise the presentation of your probate work.
Installing PPv5 is a straightforward process. If you are upgrading from previous versions, make sure you have a recent (and tested) backup of your existing PP data folder and the files within it. Settings from v4 will be automatically imported into v5, including links to your data folder, PECS unit store, form and document support packs.
1. From our website, get the 'Probate Plus v5 installer' from the downloads page.
During the installation you will need to choose where you would like to store the application. After that you may be prompted for a password. Contact us via support@lawsystems.co.uk if you need one.
The application installer (setup.exe) places the PPv5 application and database engine (ADS) onto your PC. PPv5 communicates with the ADS that in-turn handles all read/write access to your data folder.
The data folder is a location that you specify to tell PPv5 where to store the central shared database that holds your postings to PP. If you're upgrading or re-installing, this location may already be set.
If you ever need to check where that data folder is, or if you wish to create a new one, you can look under 'FILE...Options...Configure database connection'. The dialog box shown below will appear, showing the connection path.
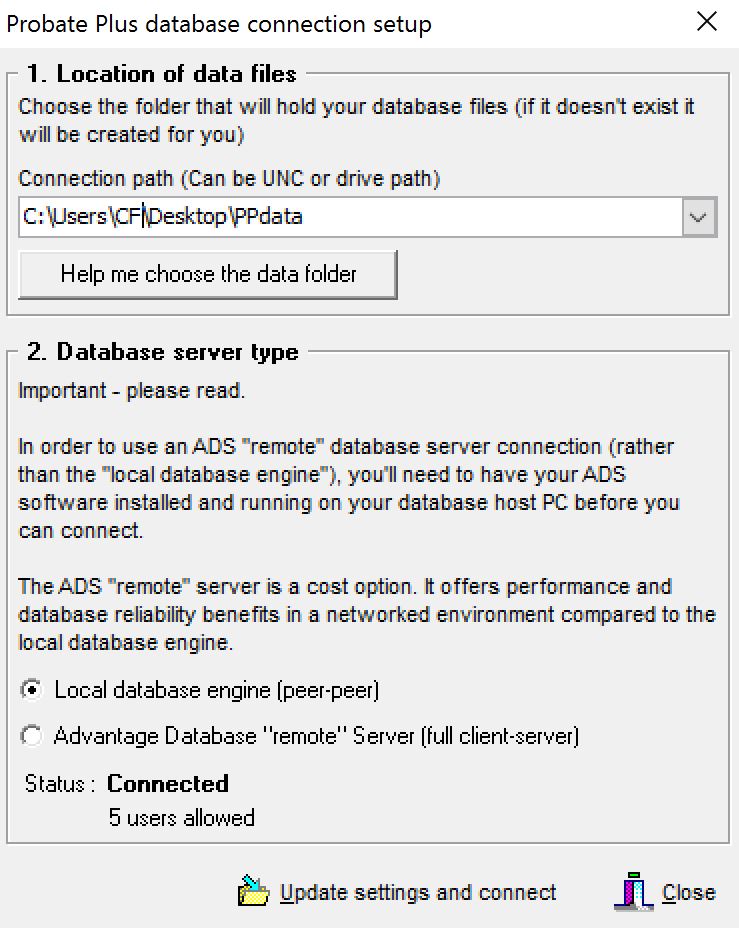
2. Choose a database server type.
If you have purchased and installed the client-server database add-on for PPv5 you'll need to choose the client-server option in the above screen. If you're installing PPv5 stand-alone or peer-to-peer with a few other PCs then the built-in (free) peer-to-peer database engine will be used automatically and you will not have to do anything.
3. Optional connection to your store of PECS units.
If you have purchased the full version of PPv5 (as opposed to an evaluation copy), you may now wish to connect it to your store of 'pay-as-you-go' units. These will either be held in our CloudLM cloud-based store or on a USB "HASP key" (This is now deprecated but is a red dongle-like USB stick which plugs into a machine on your network). Connecting is, however, optional, as not all users in an office may be given access to using or purchasing more units.
Go to 'FILE...Per-estate licensing (PECS)...Registration details' and choose either 'Internet PECS CloudLM' option or 'HASP licence manager' if your site still uses HASP.
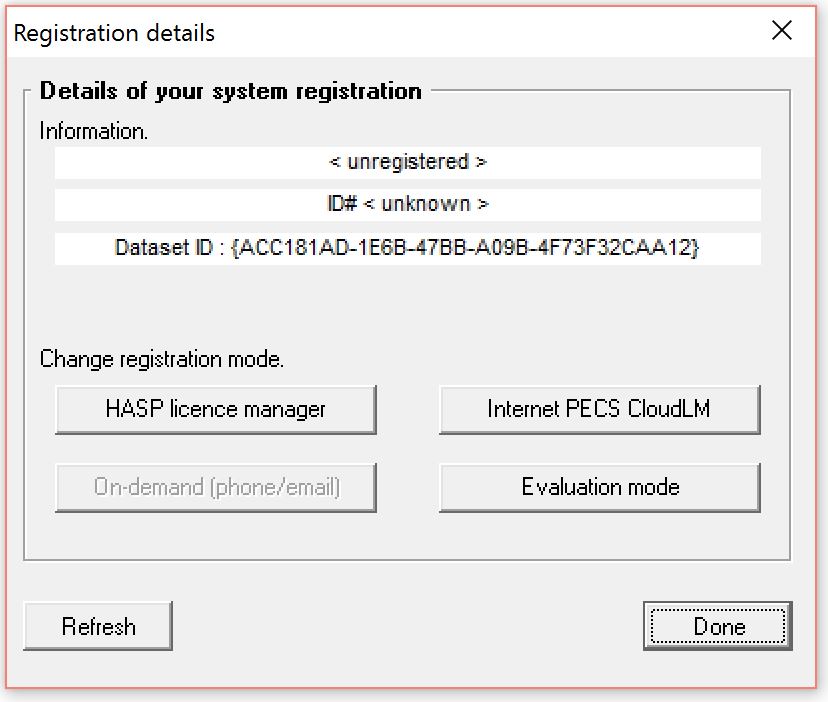
Please read the other articles in this help section if you require more information on connecting to your pay-as-you-go units. if you are upgrading, v5 should automatically connect to your existing units.
Additional Free Downloads:
If you wish to use our free to install form-filling and document pack add-ons, please refer to the other help articles on each of these, also found within this section of our Knowledgebase.